Dinghy Repair Sail Repair
Go To: Sailing - Dinghy Repair
Posted on 08 May 2008 18:51
Need to repair dinghy your sails? We've got a few tips on how to replace a sail window and mending stitching.
A few weeks ago, taking a break from the bad weather, we've switched to something we can do indoors - sail repair. The sails on our Laser 2 are a little tired and old, but still good enough for our small club racing. They've got some minor damage in the way of some fraying stitching (Photo 2), some small tears and holes, and a cracking window in the jib (Photo 1). We're on the lookout for some "newer" old sails, but not in a desperate rush.
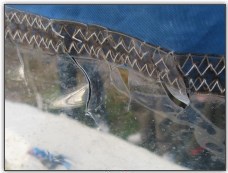
Photo 1. Cracked window
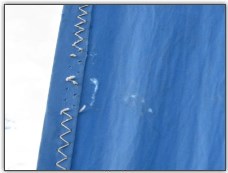
Photo 2. Unstitched sail
We found a spare non-descript jib that's only about 3 inches shorter than ours and much newer; since it's smaller than an official Laser 2 jib, our club is so small they're not concerned with measurement certificates and "official" sails so it'll do for now, which is good considering a brand new jib is £220! We've also bought a second hand spinnaker (there was no spinnaker, spinnaker lines or pole with the boat), which has been used about 4 times so is still perfectly crisp. Again it's not an official Laser 2 spinnaker; in fact it's off a Ministry of Defence Bosun, which has a spinnaker exactly the same size as the Laser 2 fortunately for us! When we move up to more competitive sailing we will buy newer sails - unfortunately once a sail gets past a certain age and condition, no amount of repairs will return it's original speed, and provided your hull and rig is up to scratch, replacing your sail will give you one of the biggest speed gains possible.
Anyway, back to the repairs. To start, we spread the sails out over the floor and went over them, both sides, looking for any damage and holes. We then went along all the seams looking for stitching that was coming undone, and found a couple of spots. We also found some pretty nasty twine like cord that had been sewn into several places on the mainsail - over the ends of the batten pockets to stop the battens coming out (which we replaced with velcro patches), which makes it a pain to store the sail, but also along the luff edge of the sail - for no apparent reason at all, since there was no damage there! This stuff made it hard to pull the sail up, so it had to come out. Other than this, the sails have a few small holes here and there, but nothing too serious.
As you can see from the pictures, the window in the jib is suffering from some severe cracking (Photo 1), a common thing on an older sail. First things first, the time consuming task of unstitching it, all done by hand (Photos 3 and 4). Once we removed the old window, we discovered that it was itself a replacement; the remnants of the original window can be seen. We decided to leave this tidy strip on the sail; the original window was not only stitched on but also glued, and it would require a lot of effort to unstitch it and clean off all the old glue residue. Also, it's providing a stable edging for the material around the edge of the window.
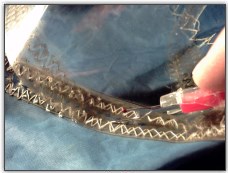
Photo 3. Unpicking the sail window
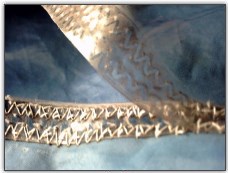
Photo 4. Unpicking the sail window
We obtained some new material for the window; not the flexible plastic we took off, but actually some see through sail material which should do the job just as well. This was obtained from Purple Marine in the West Midlands, and was an offcut that was to be thrown away, so they were very generous in giving it us for free (mind you, we will be spending a small fortune in their shop for this boat!). We're quite fortunate to live near to both Purple Marine and Speed Sails, two decent boat chandleries.
For the next step, someone needs to be good with a sowing machine, and for this Becky's wonderful mother volunteered her services. If you can use a sowing machine, it's easy enough - sails can be a bit unwieldy to manage (if you've seen the size of the sowing machines and sail tables in a sail loft, you'll understand), but it's not too difficult.
To sow a sail, you shouldn't use plain old cotton - you need special stronger cotton, which you can get from either a local chandlery or online. This is typically UV stabilised so it won't get damaged by the sun, and stronger and thicker so it won't fall apart too easily. You may need to use a larger needle in your machine, and we'd recommend testing on a small piece of whatever you are going to sow first (Photo 5). It's important here to get enough tension on the thread, as seen in the stitching on the left, all of the stitches are tight and straight. If you look at the rows on the left in Photo 5, they aren't straight, and actually look loose; this was the initial test without enough tension.
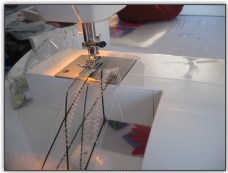
Photo 5. Testing the material
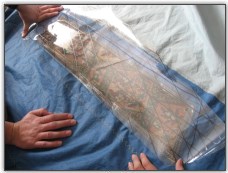
Photo 6. Measuring the new window
When you're ready, lay out the material on the sail roughly over the hole (Photo 6), and mark a line (shown here in black). Make it larger than it needs to be (Photo 7), so you can trim it down after - since the sail is slightly curved, unless you've had lots of practise it's difficult to measure and cut and sow it exactly, so this way will give an easier result, and as you'll see later, works well. Cut around the lines to get your window ready.
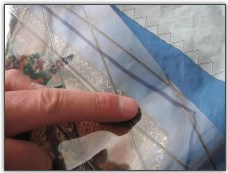
Photo 7. Window bigger than it needs to be
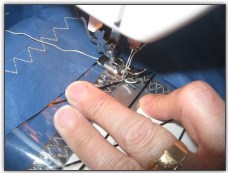
Photo 8. Tack the corners
Next, we placed a few small stitches in each corner of the window (Photos 8 and 9), lining it up as we went along, to hold it in place. Once we did this, we used some tape to hold the window down all around it's edge (Photos 10 and 11); be careful to use a tape that isn't going to use too much adhesive behind; this rules out duct tape straight away, but sellotape will do, or what we used, which was some kind of medical bandage tape. This allows you to get the window flat and positioned better; all sails have a degree of curve within their body, which you'll probably see as you tape the window down.
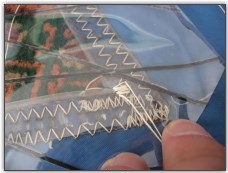
Photo 9. Tack the corners
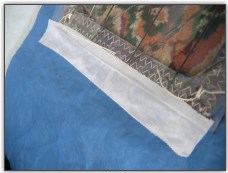
Photo 10. Tape the edges
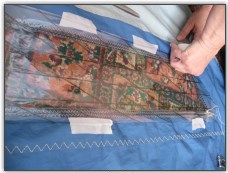
Photo 11. Tape the edges
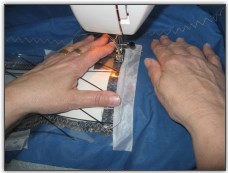
Photo 12. Start sewing
So, ready to sow? Good. Pick a corner, set the size of your stitches, and your tension, and get started (Photo 12). Take it slowly, and give yourself plenty of space for moving the sail. Our needle tended to keep catching itself quite frequently, because the thread we used was slightly too thick, but it worked ok. Go all around the edge of the window putting the first line of stitches in (Photos 13, 14, 15, 16), and get back to where you started. Check everythings flat and the stitches are ok, and if you need a second row, put this in next (Photo 17).
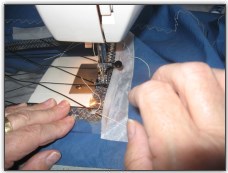
Photo 13. Short edge first
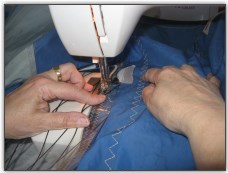
Photo 14. Round the corner
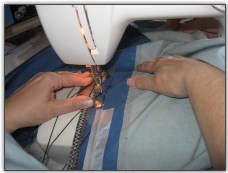
Photo 15. Third edge
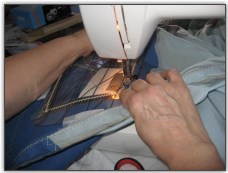
Photo 16. And round to the end
Once you're all done, tie off any stitches remaining - we left the initial corner stitches and tied them, then trimmed them. The stitching isn't perfect, and unless you practise a lot and are fantastic at sowing probably won't be as good a job as you could get done by a chandlery, but it will be at a fraction of the price, and you'll have the satisfaction of doing it yourself.
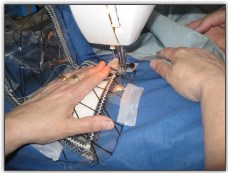
Photo 17. Second line
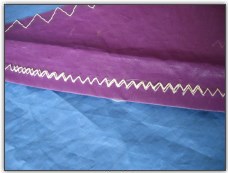
Photo 18. Repair unstitched areas
If you have any areas of the sail where the stitching is coming undone, then just overrun each end slightly, and restitch it. Be careful to adjust your tension, and your stitch size to match the existing stitches (Photo 18 and 19).
Unfortunately, the thread we chose to use for ours was slightly too thick. This meant that the tension on the bobbin on the sowing machine wasn't high enough, and while the stitching on the front looks neat and tight, on the back it's not so good. We're going to run with it for now, and if we need to, unpick it and do it again. Just because we're running this series of articles, doesn't mean we won't make some mistakes as we go along!
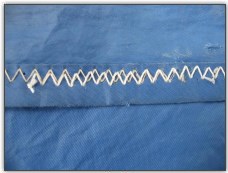
Photo 19. Repair unstitched areas
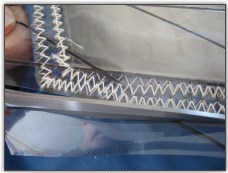
Photo 20. Trim extra off window

Photo 21. Trim extra off window
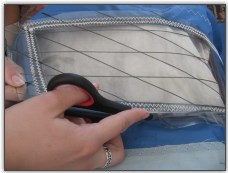
Photo 22. Trim extra off window
To finish the window, we cut off the excess plastic, carefully with a pair of scissors, leaving us with the finished window (see Photos 20, 21 and 22).
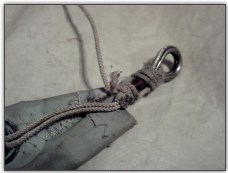
Photo 23. Top edge needs redoing
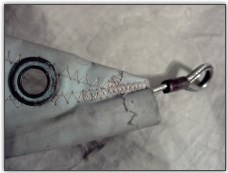
Photo 24. Cord removed
Also on the jib we redid the cord securing the top edge of the sail to the top eyelet for the halyard, as can be seen in the pictures. It was somewhat dirty and old, so we first undid the cord (Photo 23 and 24), and then replaced it with fresh cord (Photo 25). We will also do this to the bottom edge, but we need to do this while it's on the boat to figure out how tight to pull the sail.
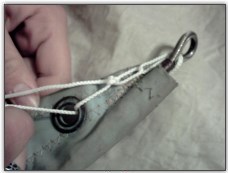
Photo 25. Tying new cord
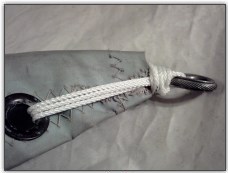
Photo 26. All done
Sometimes things come undone along the way...
Unfortunately, when we then put this jib back on the boat, we had some issues with size - in that its too big. For some reason, the jib, when on and fully hoisted, has a terribly saggy luff - and we're not entirely sure why. We had the forestay of the boat replaced (as can be seen in the mast article), but unless we're putting a lot of pressure on the forestay with the rope adjuster (which we're not) it shouldn't be pulling the mast forward enough to make the jib go saggy. Fortunately our other jib sail is slightly smaller, and requires several adjusters in the form of shackles and carabiners, but ultimately fits perfectly.
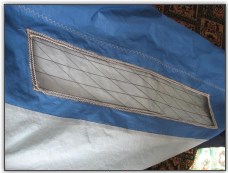
Photo 27. Completed Window

Photo 28. Our sail
The only other remaining work to do on the sail is to remove the "Birmingham Uni" black marker pen text on the foot of the sail. We've yet to find an effective way of removing this - we've had the best luck so far with toothpaste of all things! White spirits has not budged it, next we plan to try acetone.
Summary
So - a pretty long article! Sail repair is a huge subject, and we've barely scratched the surface. As already mentioned, having good sails will improve your boat speed more than anything else (provided some basic conditions are met, i.e. having no holes in the hull, possessing the ability to sail), and making an entire new sail is beyond most sailors. Doing any kind of serious repair work to sails can be a daunting prospect, and should not be undertaken lightly - if its a newer sail, we'd definitely suggest going to a chandlery to get the work done - but if its an older sail, and you're fairly confident you can do the work without damaging the sail, then you may just be able to save yourself some money, and learn some new tricks.