Dinghy Repair Hull and Deck Repair
Go To: Sailing - Dinghy Repair
Posted on 12 July 2008 18:51
Most second hand boats these days will have some kind of damage - see if you're up to the job of repairing it with our guide.
Our Laser 2 had some holes, cracks and dents that needed filling - follow through with us what we've done with them.
Unless you're trying to fix some substantial damage, mending the occasional hole or small damaged area in your boat is not a big deal, and not something to worry about. Boats these days, particularly GRP (glass reinforced fibreglass) boats are made very well, and are easy to repair. Special process boats, such as the newer Toppers and Lasers which are made by special processes called rotomoulding, are not so easy to mend, but are also harder to damage.
If you have a large hole in your hull, or you're missing a big chunk of deck, then it will definitely pay to take it to an expert, if you cannot do it yourself. However, if you have similar damage to us, which is simply 20 years worth of use, then follow our steps to have it looking as good as new in no time!
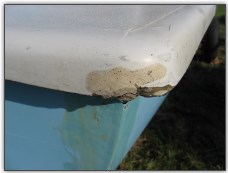
Photo 1. Damaged Deck
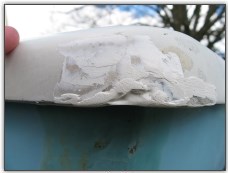
Photo 2. Repair in Progress
Our Laser 2 has a number of areas that we need to sort out. The worst pieces of damage are the rear deck corner, which is missing a small piece of fibreglass, and a small hole which has been punched through the hull. There are lots of other small areas, such as surface cracking and crazing, and these will all be fixed with Gelcote filler. For the surface crazing, you could use actual gelcote, perhaps with some thickening micro glass beads - but we decided not to due to problems with matching the colour of a 20 yr old faded gelcote, but more on that later.
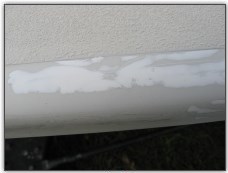
Photo 3. Surface cracks everywhere
Before any filling work can go ahead, all areas to be filled should be lightly sanded - in the case of damaged areas this helps remove any lose material which will be too weak to bond to for a good join. Once lose material is removed, then continue sanding a little to rough up the area and give the gelcote or filler something to bond to. Any sanded areas should then be cleaned down with either acetone or white spirits to clean off any dust and residue. If white spirits are used, be sure to clean off any residue left over.
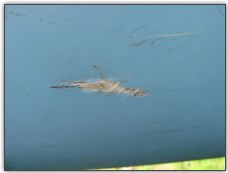
Photo 4. Clean areas to be repaired first

Photo 5. Clean areas to be repaired first
We used a two part gelcote filler. When working with this type of filler, as with most two part fillers, you only have a limited time to work it. Be sure to mix it thoroughly. With the gelcote filler we had, we were provided with a large tube of filler, and a smaller tube of catalyst - if the two parts are not properly mixed, it will never dry or cure properly (or will take a very long time). Approximately the same length (that's length, not volume or amount) of catalyst/hardener should be squeezed out to match the filler. Be sure to mix it thoroughly, with either the mixing card provided or if you have lots to do, the credit card which you broke the limit on buying the boat, fittings, sails, clothes and sailing club fees is good also. About 5 minutes of mixing should do the trick - just ensure it's mixed properly, fold it back on itself, stir it around, it doesn't matter as long as it mixes properly. Once mixed - get to work, since you only get about 10 minutes before it starts going tacky and sticking to everything including the applicator!
When you use gelcote filler you'll realise you cannot build up large amounts in one go; small areas such as covering cracks or small holes can be done in one round, but areas such as the rear corner of the deck took about 3 applications of filler.

Photo 6. Rough up the area to be filled
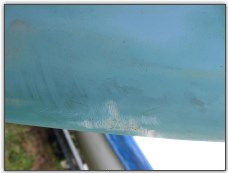
Photo 7. Rough up the area to be filled
We tried to keep the amount of gelcote filler we applied to a minimum, since it takes 10 seconds to apply but 10 minutes to sand back off again when dry. The cracks are hard to fill and mostly didn't, although some larger cracks picked up the filler. We plan to re-gelcote the cracked areas so this didn't matter too much.
When we examined the gunwhales, there was already some not so good filling in place - this was sanded out or sanded flush where needed, and new filler applied to make the gunwhale a uniform shape and remove sharp edges that were there. Each gunwhale had rather a lot of small damaged areas, and they were all filled. The filler was applied until slightly too much was on, allowed to dry then sanded flush.

Photo 8. Repairing the Gunwhales
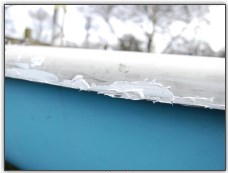
Photo 9. Repairing the Gunwhales
The back corner required several applications of filler to build it up. Since this is not an area which takes any degree of structural strain, this filler should stay in well (unless it receives a substantial bash). After building up, the area was sanded flush.
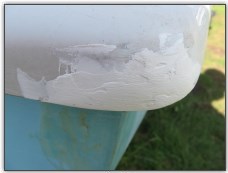
Photo 10. Repairing the corner
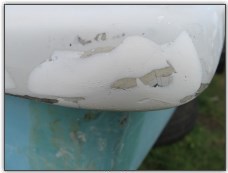
Photo 11. Repairing the corner
Finally up top, the back edge of the cockpit had a chunk taken out, deep enough to expose the fibreglass. This was excavated slightly deeper to remove any lose debris, and then filled, and sanded like everything else.
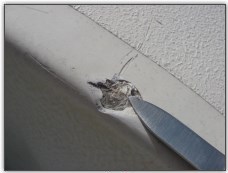
Photo 12. Cockpit damage
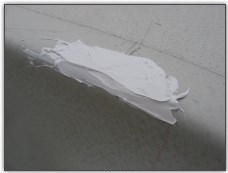
Photo 13. Cockpit damage
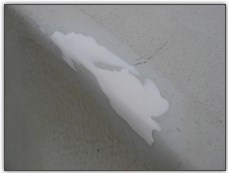
Photo 14. Cockpit damage
The front of the hull had the usual chips taken out of it that you find on most Lasers, and these were simply lightly sanded, filled, and sanded flush with the surface. We'll give these a little more attention when we come to paint the hull.
Unfortunately a previous owner made the decision to overtighten the fittings for the shrouds, and for the bullseyes/fairleads on the deck. Basically, they screwed them down too tight, and cracked the deck around them. The deck is strengthened in all these places by presence of a piece of thick aluminium underneath the gunwhale, which the bolts go through. Therefore the cracking on top is nothing other than cosmetic - simply unsightly. We've got some special washers to go on top, as can be seen in picture xxx. They are aluminium on top, and rubber underneath, so should press down onto the deck nicely, and keep water out of the holes. That's the main problem with holes and cracks in the deck - if water gets in, and freeze-thaws over the winter, the fibreglass can eventually delaminate. What might not be a problem now could well be in a few years time!
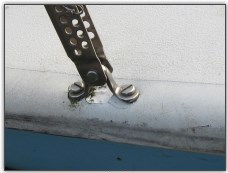
Photo 15. Don't tighten fittings too much
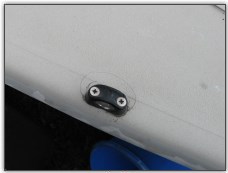
Photo 16. Don't tighten fittings too much
The hull had one serious piece of damage, where it looked as though the boat had been rolled onto the trailer, and it had almost punched through the hull, but not quite. We had two options at this point. The first would be to cut an inspection panel in the deck, make the hole in the hull larger, and properly patch it with a piece of fibreglass matting, and some resin. The second option was to simply fill with gelcote.
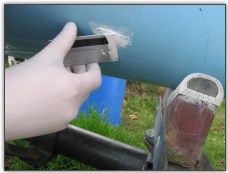
Photo 17. Apply filler with an old store card or similar
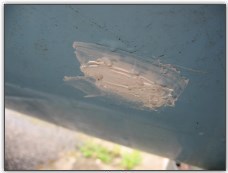
Photo 18. The filled hole ready to be sanded
Because the hole hadn't quite gone all the way through, we decided to gelcote filler it. We sanded it down flush, and then a bit more to "key" the area and give the filler something to grip to, then filled and sanded it down in the same way as all the other areas. Technically, the inspection panel and fibreglass matting would be the "proper" way to repair a hole in the hull like this, but since it hadn't gone all the way through and was relatively small in a none-load bearing area, we decided that the inspection panel would weaken the deck too much, and would be too much effort, to be a valid compromise. Once the hull has been repainted, you won't even be able to see the filled patch.
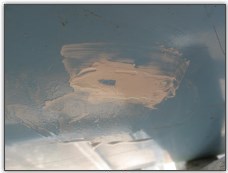
Photo 19. Use water with wet and dry paper
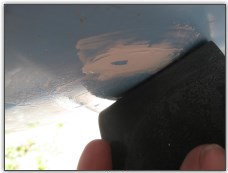
Photo 20. Use water with wet and dry paper
The front of the hull had the typical damage you see on a laser, when it gets dragged up the bank, chips missing, particularly underneath at the nose. These again were easily filled.
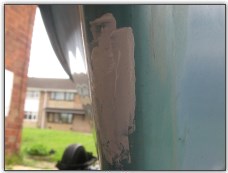
Photo 21. Hull ready to be sanded
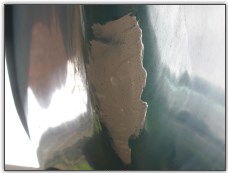
Photo 22. Hull ready to be sanded
The final part that needs looking at is the nose of the deck - and this will be addressed later, when we take it for painting. It's structurally sound, where the front ring goes through the nose, but its had some abrasion from a rough painter rope by the looks of it, and needs a bit of cosmetic work doing to it.
Summary
So, for the cost of a few afternoons work, a tube of gelcote filler and some sandpaper, we've fixed up quite a lot of imperfections on our boat. None of them would seriously impact performance, with the exception of eventually the hole in the hull (sinking does tend to slow you down), but not only do we take pride in our sailing but we especially take pride in our boat. It's looking a bit like a patchwork quilt at the moment, but when its done it'll look better than it did.
There are people out there who will buy a boat new, sail it for a few years and then sell it on when it picks up imperfections and damage. People like this are either pretty well off and can afford to do it, or want the absolute best kit and won't settle for anything less. If you've got the money to do this, then that's fine and we won't judge you for that.
However - there are a lot more people out there who can't afford to do this, and that's who this article is aimed at - people who aren't afraid to get their hands dirty to keep their boat looking as good as they can get it, but on a budget.