Dinghy Repair Repainting a Boat
Go To: Sailing - Dinghy Repair
Posted on 16 November 2008 18:55
Repainting a boat is not a task to underestimate - you can't just open a can and slap on a bit of paint. Find out how to prepare and paint your boat properly.
We decided fairly early on to repaint our Laser 2 - the original gelcote was glossy mostly still but faded in places, it had a couple of spots where we had put on filler and a few areas where it had been repaired and rather badly gelcoted before. We liked the colour, but the only way to get the same colour again would be to re-gelcote it.
We did some research to decide whether to re-gelcote the boat, or to paint it instead, and every resource we found on gelcoting pointed to one conclusion - if you value your time, don't try to re-gelcote a boat. So, we decided to paint it instead.
The paint we chose was International Topcote, Largo Blue. This paint has a nice glossy, low-friction finish, but it also contains particles of Teflon, which makes it very hard wearing and resistant to damage - the closest you'll get to gelcote without using gelcote.
Preparation
Unfortunately, you can't just flip a boat upside down and get painting. Paint won't adhere or stick well to old gelcote (it has a waxy outer layer), so the first thing to do is to clean it up. And here we run into the first problem - the British weather. We'd been hoping to paint the boat since about March, and finally managed in late July. At just over 14 feet long and 5 feet wide, the Laser 2 was slightly too large to fit in either of our garages (that's assuming we could have emptied everything else out). In the end we painted it on Becky's driveway.
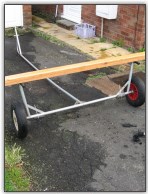
Photo 1, Setting up the trolley
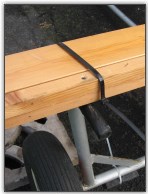
Photo 2, Securing the crossbeam
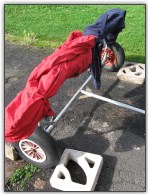
Photo 3, Padding the supports
As you can see in the pictures, we turned it upside down on top of the trolley. Since the trolley is a gunnel-hung type, we placed two large pieces of wood (actually bed struts) across the gunnel supports (Photo 1), and tied them on (Photo 2). We then put two old jackets across the wood to protect the deck (Photo 3). On the front we put a small piece of wood (actually a drawer front) and padded it with plastic (Photo 4), and tied it on.
The boat was flipped upside down with the help of two neighbours walking past with very unfortunate timing (Photo 5), and at first it didn't need securing on - we only tied it on later when we left for a few hours. It was stable enough it wouldn't come off, but it came close - all I'll say is to be very careful when you're sanding!
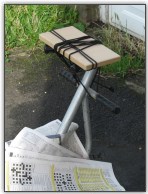
Photo 4, Widening the front support
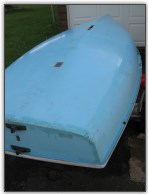
Photo 5, The boat turned upside down
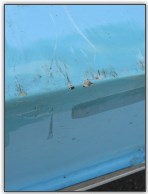
Photo 6, The damage to the back of the boat
As far as preparation goes, you don't need to remove all of the old gelcote - you just need to "key" it up basically, to do this we decided to remove the shine (basically the wax) off the old gelcote. We set about sanding the boat (Photo 8), first using a fairly course wet and dry paper, but quickly realised it would take a lot longer than the time we had. We switched to a green aluminium oxide paper (it doesn't clog as quickly as sandpaper), about a 60 grit (Photo 9). This speeded up the sanding quite considerably - you just have to be careful you don't go through too much gelcote and go down to the fibreglass.
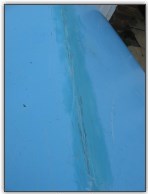
Photo 7, Typical damage to the underneath
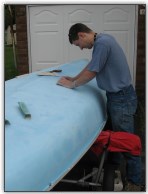
Photo 8, Sanding the gelcoat off
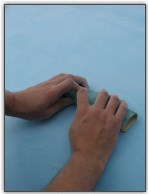
Photo 9, Sanding the gelcoat off
In areas where there is damage, such as the underneath of the back of the hull, make sure you take it down just that little bit further, and try to get it all to a smooth finish; either that, or invest in some filler, and fill the depressions.
Sanding off the gelcote finish took about 3 hours worth of work. A surprising amount of dust is generated from this (Photo 10); it's important to clean it off as you go along, so you can see how you are getting on; at this point it's best to use just a brush to wipe it off dry, and keep water away until you're done, otherwise it will destroy the sandpaper. When you're finished with sanding (or at least you think you are), rinse off the entire hull with soapy water, then rinse with clean water, and allow it to try. You'll probably find you still have a thin coat of dust over it (it's a pain to get rid of!) and you'll need to wipe it over with a cloth.
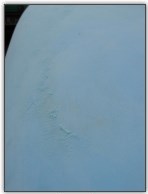
Photo 10, Gelcoat dust
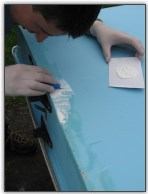
Photo 11, Filling the holes
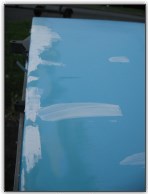
Photo 12, Holes filled, waiting for it to dry
Repair
Once it's clean, set about filling any areas that need it; in our case, this was the underneath of the back of the boat (Photo 12), some spots along the centrejoin (Photo 19), the rear corner of the deck (Photo 13) and the odd patch here and there where it had suffered a "ding". When doing this, you'll start to get a full appreciation of how easily your boat can pick up damage when it's being dragged up a shingle beach!
We also took the opportunity to remove the carpet from the centreboard slot (Photo 14); it had been leaking since we started sailing the boat, and we planned to replace the carpet. We did replace it after painting, unfortunately with carpet that was slightly too thick; we ended up removing one half of the carpet, and the slot still leaks just as much as before!
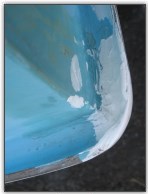
Photo 13, Back corner filled
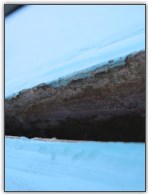
Photo 14, Centre slot gasket cleaned out
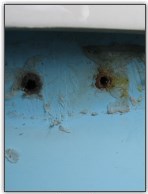
Photo 15, Removing the rudder pintle
When you have carried out any necessary filling work, and sanded that all down (see one of our articles on filling), it's time to clean the boat again, and get it as clean as possible this time, because the next step is painting! Any dust left on now will show up very clearly when painting, and ruin the finish. Rags or dusters and water are the only way to ensure it gets completely clean (Photo 20).
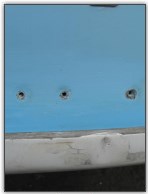
Photo 16, Pintle holes cleaned

Photo 17, The hull filled

Photo 18, Gunwhales sanded and cleaned
Painting
Congratulations, you're now ready to paint! At this point, some people will reach for the spraycan; you can apply International Toplac with a spraycan, but we neither had a spray available, or the facilities to paint within, so we used a roller. As you will see from the finished pictures, you can still get an excellent finish from using rollers. It's important however that you use gloss rollers (basically a foam roller) rather than matt rollers (which are like a fabric brush and leave bits behind).
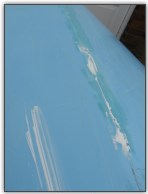
Photo 19, Underneath of the boat filled

Photo 20, Cleaning off the dust
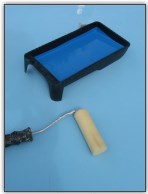
Photo 21, Ready to paint
Start in one area (we chose the back) and gradually work forward (Photos 22 and 23). Be sure you get good coverage, so the previous colour doesn't show through; Toplac applies well, and thickly (Photo 24). The gunnels can be quite tricky; we had to resort to using a paintbrush to get in under the gunnels (Photo 25), and then smooth it out the best we could with the roller. Unfortunately this can be quite messy, and a fair amount of paint went onto the cream deck during this, which we immediately cleared off after with white spirits and a rag (Photos 28-30). If you leave it until it's dry, well, good luck!
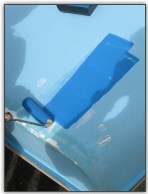
Photo 22, Laying the first strokes
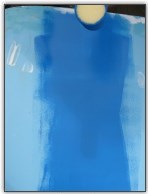
Photo 23, Painting the boat
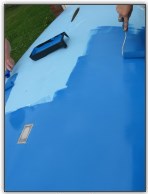
Photo 24, Painting the boat
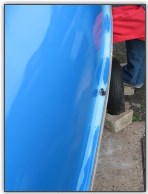
Photo 25, Painting the gunwhales
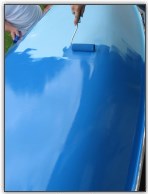
Photo 26, Coming along nicely
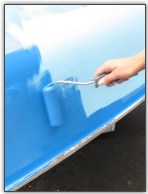
Photo 27, Painting the sides
You'll find that the paint won't take long to start going off; after about 15 minutes after applying, the first patches were starting to go tacky to the touch. Keep moving forward; if you do the back end first, it's the largest area, so it will have longer to dry. Move all the way up the boat, and try to keep it even over both sides (two people painting improves your chances), so you don't end up trying to meet up in the middle and having a thicker coat in the middle, where you've painted one side, allowed that to dry then overlapped it again when doing the other side.
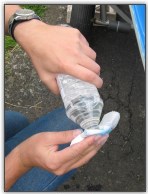
Photo 28, Cleaning off extra paint
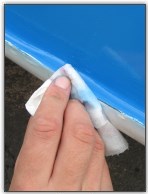
Photo 29, Cleaning off extra paint
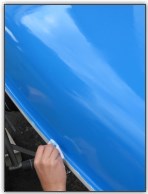
Photo 30, Cleaning off extra paint
We kept going until we reached the front; and there's not much more to say on the painting front. After that, you have to let it dry; how long it will take depends on the temperature. If it's about 20°C, it will take about 2 hours to be touch dry; if it's about 10°C, it will take about 6 hours. It was about 15°C when we painted, so we reckoned it was going to take about 4 hours; we started on the Sunday morning, and needed to get it back down the club by the evening.
Unfortunately, about 5 minutes after we put the last brushstrokes on, it started to rain. Slightly tacky paint and water don't mix well. Even paint that is almost touch dry, and just very slightly tacky, if it has water droplets sitting on it, it can still lift off the paint. Cue a rather comical scene with everyone rushing around, the front of the boat being pulled 6 feet into the garage to protect the freshest painted areas, and a car cover being draped from the garage door over a washing line, with guy ropes being tied to the said washing line and car cover, wrapped around bricks and tied to the trailer to spread the cover out (Photo 33).
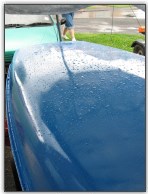
Photo 31, Bit wet!
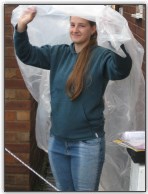
Photo 32, It will help us much more on the boat...
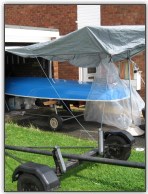
Photo 33, Anything to keep it dry...
The next unfortunate realisation was that the car cover was not waterproof and was leaking; so we then added a large plastic cover over the back of the boat, and we stood for the next hour squidgeing water off the boat, to keep it off the paintwork. Unfortunately with the boat being upside down, any water that did hit it ran off down the sides and sat in the gunwhales.
Photo 34, Spot damage

Photo 35, Finished boat
Nervous times...
We had a nervous couple of hours while it rained on and off, waiting for the paint to dry. Fortunately it was dry enough to the point where it didn't cause any damage; if you look closely enough in the pictures you can see very slight pitting where the rain started lifting the paint off, but these are only very slight (Photo 34). Ideally with toplac you are going to apply two coats anyway, so in this situation you'd use a very fine grit wet and dry paper (about 1600) to very lightly sand off the pitting, and then apply another coat of paint. Unfortunately due to time constraints (and bad weather) we didn't have the opportunity to apply another coat; this one is good enough for us, but if you're a perfectionist, you may wish to give it another coat.
Summary
Painting a boat is not something that should be undertaken unless you are aware of the amount of work to be done; if your gelcote is in good condition, and only has a few marks, then we'd recommend leaving it a bit longer; ours was fading and chipped, and had a number of mismatched patches all over it, and was starting to look worn.
Good luck with your painting adventures, and be sure to send us any pictures!