Streaker Rigging Guide
Go To: Sailing - Rigging Guides
Posted on 30 December 2008 14:55
Yet another class designed by the infamous Jack Holt, originally designed as a plywood home built DIY boat, the newer models are FRP or GRP.
The Streaker takes about the same crew weight as a Laser, around 10-13 stone, but requires less agility, and is slightly more forgiving, ideal for the older or more relaxed sailor who still wants performance in a boat.
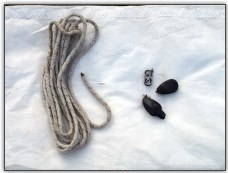
Photo 1, Parts ready for rigging
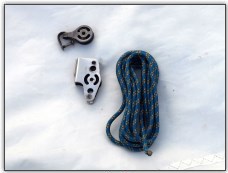
Photo 2, Parts ready for rigging
What You need
- Hull (Photo 4)
- Mast + Shrouds and Forestay (Photo 9)
- Boom (Photo 3)
- Main Sail (Photo 3)
- Rudder (Photo 3)
- Daggerboard (Photo 3)
- Outhaul
- Downhaul
- Kicking Strap and Blocks (Photo 2)
- Mainsheet and Blocks (Photo 1)
- Bungs
- Painter Rope
- Horse/Traveller
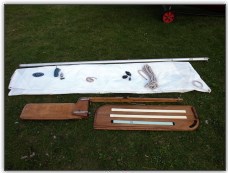
Photo 3, Parts ready for rigging
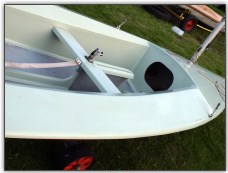
Photo 4, The boat
Lets Get Started!
Before starting for the first time, make sure you have everything available, or a rope and spares box handy. As you can see this is a very similar setup to a Laser 1, with much of the kit similar, the chief being a stayed mast. What we're about to rig is class legal - but is not necessarily the best you can rig a boat under class rules. Since it is a restricted design rather than one design, there is room for alternatives, so if you want to experiment or upgrade, we suggest you take a look at the Streaker Class Rules for more information, including details of an 8:1 kicker, 4:1 downhaul and 4:1 outhaul.
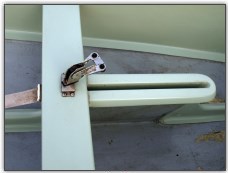
Photo 5, The cockpit
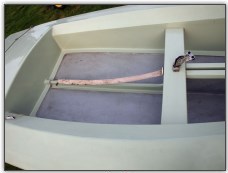
Photo 6, The cockpit

Photo 7, The transom
1. Mast
Unfortunately we did not have time to take apart the mast and take it down. If yours comes with the mast off, which it likely will, it's a simple matter of untangling the shroud and forestay wires, dropping the bottom of the mast into the mast hole (after checking the bottom of the mast is clean), and then securing the shroud and forestay wires with split pins and rings or whatever other fittings are on your boat. Unlikely most stayed masts, this can be a one man job, as the mast drops in a hole rather than resting on top of the deck and stays there while you attach the wire supports.
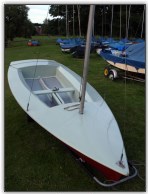
Photo 8, The boat
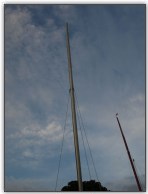
Photo 9, The mast
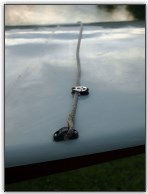
Photo 10, The hull
2. Boom
The boom on our Streaker has a fixed pin style gooseneck (Photo 11) to secure the boom onto the mast. First, we put the boom back on; line up the holes, slide the pin through and secure with a split ring (Photo 12). This holds the boom onto the boat and you won't have to struggle with it whilst hoisting the sail.
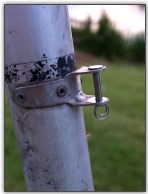
Photo 11, The gooseneck
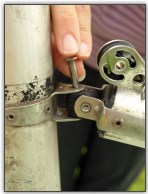
Photo 12, Fitting the boom
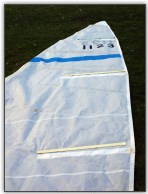
Photo 13, The sail
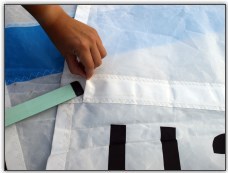
Photo 14, Fitting the battens
3. Sail
Unroll the sail, and check for any damage you may need to repair (Photo 13). Check the mast luff rope is in good condition, and the top isn't frayed, otherwise you could have difficulty pulling it up the mast slot. If it is frayed, you may need to burn or cut it to tidy it up. First, put all the battens into the sail - there should be three (Photo 14). Make sure you tuck the ends into the pockets so they don't come out while you're sailing along.
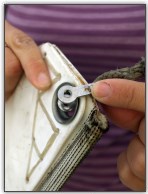
Photo 15, Rigging the mainsail
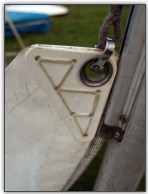
Photo 16, Rigging the mainsail
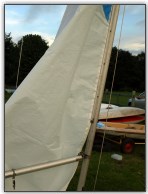
Photo 17, Hoisting the mainsail
Attach the end of the main halyard to the top of the sail (Photo 15), guide it into the mast slot (Photo 16), and hoist it (Photo 17). It may be easier with one person guiding it in while the other hoists - if it's stiff, then grease the mast slot with a water based lubricant to - don't use oil based ones as they may deteriorate the sail or stain it. Once the sail is hoisted, cleat it off as shown (Photo 18). Tidy up the halyard (Photo 19), and stow the end in the cockpit (Photo 20).
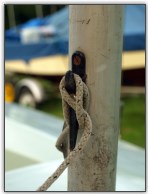
Photo 18, Cleat off the mainsail
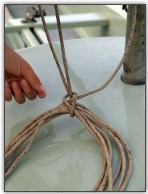
Photo 19, Tidy up the halyard
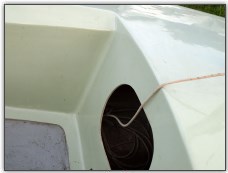
Photo 20, Tidy up the halyard
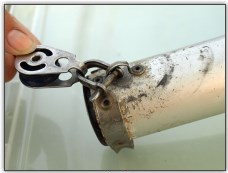
Photo 21, Setup the outhaul pulleys
4. Outhaul
Now attach a small pulley with a shackle to the fitting at end of the boom (Photo 20); for other boats it may be different but for this streaker there are no adjustable fixing points meaning the outhaul and downhaul are not adjustable while sailing, although it would not take much to make them adjustable - as it stands they should be set in a good average position for the sailing conditions when rigging. Next, attach the outhaul rope to the clew using a bowline; take this rope around the pulley block (Photo 22), back through the clew (Photo 23), around and underneath the boom (Photo 24), then back through the clew, as shown.
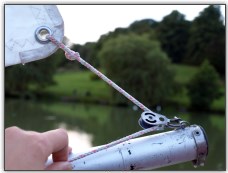
Photo 22, Add the outhaul

Photo 23, Add the outhaul
Depending on the length of the rope and if you have fixing points available, take it back round again and secure it with a few hitches, if you have fixing points you will need an extra piece of rope to act as a clew tie down which you should tie off with a reef knot under the boom.
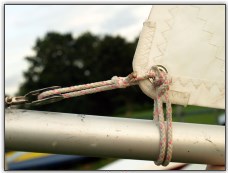
Photo 24, Rig the outhaul
Photo 25, Add the mainsheet blocks
5. Main sheet and blocks
The next task is to attach the pulley block for the main sheet system - for those laser sailors out there it is the same set up and for those of you who aren't Laser sailors, this is how its done.
Photo 26, Rig the traveller
First attach the main block with the becket to the end underside of the boom (Photo 25). Next, attach the traveller as shown in Photo 10, which should have a set of blocks attached together to fit on to the traveller (Photo 26); on our demo boat the traveller was spliced on to a fairlead and could not be removed. Cleat the traveller off inside the cockpit.
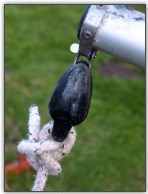
Photo 27, Add the mainsheet
To rig the main sheet, attach it to the becket on the block attached to the boom using a bowline (Photo 27). then follow the rope down to the block on the traveller, making sure the rope goes through front to back (Photo 28) and then back up to the top block (going back to front, Photo 29) follow the boom along with the rope feeding it though any fair leads on the under side of the boom; ours doesn't have any - the potential danger here is if the main sheet sags in low wind you could catch your head in it.

Photo 28, Rig the mainsheet
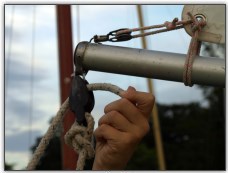
Photo 29, Rig the mainsheet
Continue feeding the mainsheet though the pulley half way along the boom (Photo 30) and then down to the main block in the cockpit on the back of the centreboard casing (Photo 31). Secure the end with a stopper or figure 8 knot (Photo 32).

Photo 30, Rig the mainsheet
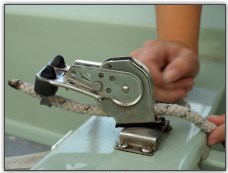
Photo 31, Rig the mainsheet
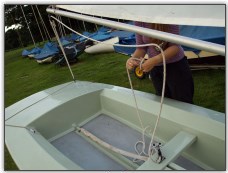
Photo 32, Rig the mainsheet
6. Downhaul
Secure the downhaul rope to the sail using a bowline or stoper knot as shown (Photo 33), then feed the working end through a pulley block on the top of the boom (Photo 34), back up to the eye of the sail and secure it with a few hitches if you don't have fittings for the boat (Photo 35). The downhaul can be changed in a number of ways - the Streaker class is not as restrictive as other classes, for example Lasers. See their website for more details.
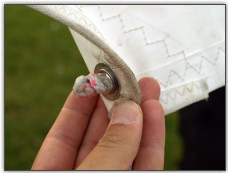
Photo 33, Add the downhaul
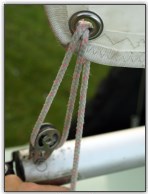
Photo 34, Add the downhaul
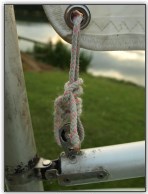
Photo 35, Add the downhaul
7. Kicking Strap
Attach the jammer block to the under side of the boom with the v-jammer pointing backwards (Photo 36), and attach the pulley block to the mast point. In our case the jammer is attached with a shackle to a braided rope around the boom to the fairlead (Photo 37); other Streakers may have a fairlead or key slot type fitting underneath. Secure the first end of the kicker rope to the becket on the v-jammer pulley (Photo 37), and then feed the working end through the pulley block attached to the mast taking it through back to front (Photo 38), following it back up to the 'v'jammer and through pulley and jammer, front to back (Photo 39) and the finish off with a stopper knot or figure 8.
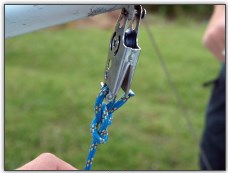
Photo 36, Add the kicker blocks
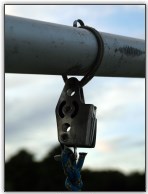
Photo 37, Add the kicker blocks
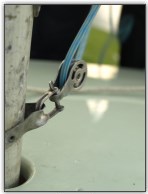
Photo 38, Add the kicker blocks
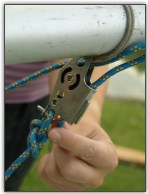
Photo 39, Rig the kicker
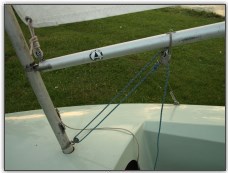
Photo 40, The complete cockpit rigging
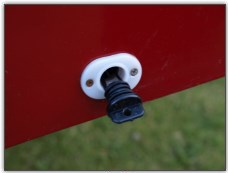
Photo 41, Don't forget the bung
8. To Finish
The last step is to eensure all bungs are inserted (Photo 41) and self bailers are raised. Add the dagger board (Photo 42), and if possible, attach a secure line from it around the mast to make sure it stays attached to the boat if you capsize (elastic bungee is good for this). Add the rudder and tiller (Photo 43), passing it underneath the traveller and fitting it on to the rudder pintles (Photo 44).
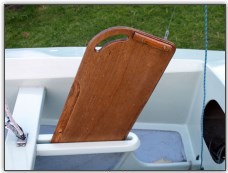
Photo 42, Add a daggerboard
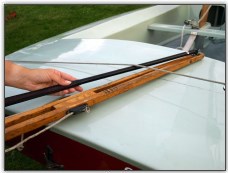
Photo 43, Attach the rudder
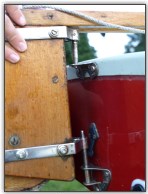
Photo 44, Attach the rudder
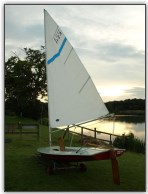
Photo 45, The boat completed
Congratulations, you now have a Streaker ready to launch, which should look something like Photo 45 although perhaps not with this idyllic sunset (we had 5 minutes to derig the boat at this point and get out of the park before it got locked), get your gear and go!