Dinghy Repair Centreboard Damage
Go To: Sailing - Dinghy Repair
Posted on 03 June 2008 15:44
Centreboards and daggerboards, as strongly constructed as they are, can take a pounding when sailing. Find out how to bring them back up to scratch.
The centreboard or daggerboard is a pretty essential piece of kit on your dinghy. You probably won't realise just how essential it is until you try to sail without one - try it sometime, it's an interesting experience! Unfortunately, extending underneath the boat they are prone to damage; where you sail may be shallow if it's inland waters, you may have unknown underwater obstructions, there are a number of reasons why it might get damaged.
Fortunately most damage that occurs to centreboards or daggerboards is usually cosmetic. Wooden and resin (GRP) ones can take a pounding without taking too much damage. This article will only concentrate on fixing minor pieces of damage - any serious damage should be looked at by a professional, or even consider getting a new or replacement piece of kit.
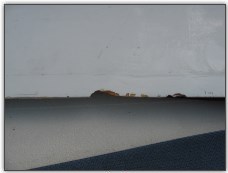
Photo 1. Chipped back edge
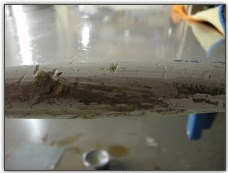
Photo 2. Ground bottom
On the daggerboard for our Laser 2, there were a number of issues. Firstly, a chunk had been taken out of the back edge; you may think this curious, but when the thick front edge of the daggerboard hits something underwater, due to its' thickness it's unlikely to take much damage, but it shoves the board back in it's slot, and the thin back edge can break. That's what had happened on ours, and as you can see in Photo 1, there's a chunk missing. There were other smaller issues like this, and the underneath of it had been quite seriously ground down from too much running aground (Photo 2 and 3), or using the centreboard as a brake as they came into land.
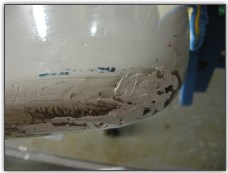
Photo 3. Ground bottom
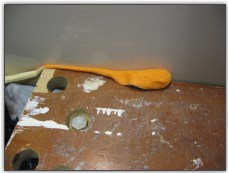
Photo 4. Pad the clamped edge
The Laser 2 daggerboard is an epoxy type board; it actually has a steel mesh core of sorts, with epoxy around it, which curiously (by design no doubt) gives it enough bouyancy to float, so you're unlikely to have it sink on you if it becomes detached from your boat. There are several ways we could have approached the repair; we could have used a gelcote based approach, using miniature glass beads as filler; this involves using a two part epoxy based gelcote colour, missing the two parts together, and mixing small glass beads in to thicken it up, and then filling the crack with this; which is quite a messy and difficult approach. Alternatively, we could have used a fibreglass based resin with a small piece of fibreglass matting to fill the hole - but it was two small for this.
We decided to use some of the gelcote filler we've used elsewhere on the boat to fill holes and cracks, due to it's strength, which up until now had proved good. Unfortunately, unknown to us that was about to change.
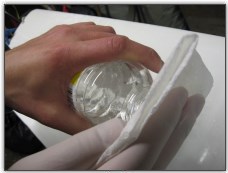
Photo 5. Clean the sanded parts first
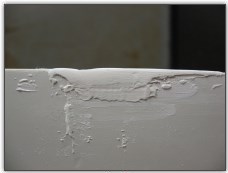
Photo 6. Build up more than you need
First, all of the damaged areas were sanded slightly to roughen the edges, and give the filler something to grip to, and then cleaned down and wiped off with white spirits (Photo 5). Acetone is better; it evaporates without leaving any residue behind, but white spirits will do, you just have to take care to wipe off the residue after. Wiping down with water is of little use - too much dust is left behind.
When working with two part gelcote filler, as with most two part fillers, you only have a limited time to work it. Be sure to mix it thoroughly. With the gelcote filler we had, we were provided with a large tube of filler, and a smaller tube of catalyst - if the two parts are not properly mixed, it will never dry or cure properly (or will take a very long time). Approximately the same length (that's length, not volume or amount) of catalyst/hardener should be squeezed out to match the filler. Be sure to mix it thoroughly, with either the mixing card provided or if you have lots to do, the credit card which you broke the limit on buying the boat, fittings, sails, clothes and sailing club fees is good also. About 5 minutes of mixing should do the trick - just ensure it's mixed properly, fold it back on itself, stir it around, it doesn't matter as long as it mixes properly. Once mixed - get to work, since you only get about 10 minutes before it starts going tacky and sticking to everything including the applicator!
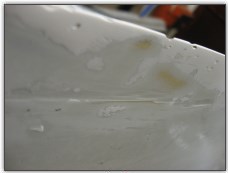
Photo 7. The squished edge
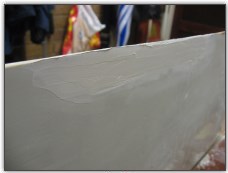
Photo 8. Filled Up
When you use gelcote filler you'll realise you cannot build up large amounts in one go; so for the large chip taken out of the back, we drilled a small hole in the middle, and from that extended out a 3/4 inch thin nail (panel pin to be exact). This gives us something to build up the gelcote around. We started by building up as best we can,and building it up in several coats.
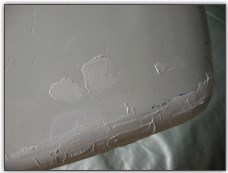
Photo 9. Bottom Filled
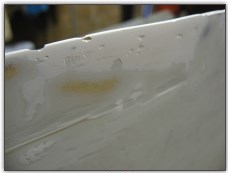
Photo 10. Started Sanding
We did the same for other areas - you'll find this is literally building up different parts in different layers, a bit at a time, until you fill up all the holes to a level higher than they need to be (Photo 6). Once the large chips are filled in, we worked on the other areas around them; the back edge seemed to have been compressed slightly (Photo 7), as if the back edge had been tightened in a vice, so a thin layer of gelcote was used to fill this out (Photo 8).
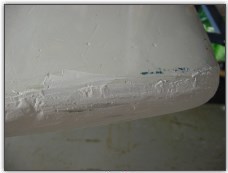
Photo 11. Bottom Filled
Photo 12. Still some holes
First, just attempt to get some filler in - and when you have enough in, start smoothing it out with the applicator. Try not to put too much extra on, as you'll spend 10 times the amount of time taking it off again with sandpaper.
As for the bottom - this took more work. As already mentioned, it's important to build up the material in layers (Photo 9). It took approximately six applications of filler to the bottom to build it up sufficiently. As you can see from the photos, we did sand it down slightly in between layers - its difficult to tell whether you have enough filler in with some big amounts to do, unless you start to sand it flush, and then you can see where you need to put some more.
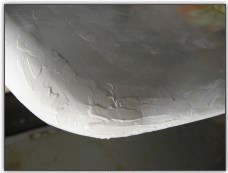
Photo 13. Holes all filled
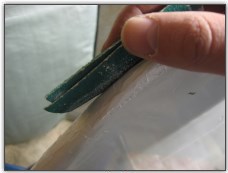
Photo 14. Sanding the bottom
It'll usually take about an hour for the gelcote filler to go off completely, although you can speed this up by adding more hardener to the mix, or slow it down by using slightly less. Once it's dry, you can either sand it when its almost completely dry, or you can leave it until it's completely hard. We tended to do the latter with all our filling.
The sanding was done mostly with wet and dry paper, although for larger areas where too much filler was used, we used green aluminium oxide paper of approximately 60 grade, which is really coarse. This takes down big excesses of filler quickly, although be careful you don't go too far and take the remaining centreboard material off! Once the worst of the excess is off (Photo 10), switch to wet and dry paper, starting with a fairly rough grade at about 120 or 160, and as you take down the filler to get it flush with the centreboard, move up to higher grades like 400, which will leave the filler with a nice smooth finish. Use water with the wet and dry paper - it'll stop it clogging up and make it easier to sand. If you have to do any work like we did, that affects the profile, make sure you try to match the profile to the surrounding areas - some boat classes (such as the Laser 2) have a minimum width you are allowed to file the trailing edge of the centreboard to.
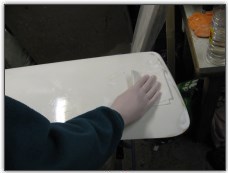
Photo 15. Wiping away the dust
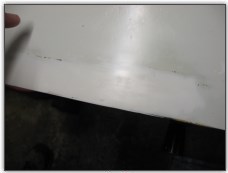
Photo 16. Edge all finished
All of this will take some time, so be prepared to spend a good few evenings on it. We had our centreboard clamped in an old black and decker workmate, padded with some gardening gloves where it was clamped to avoid damaging it further (Photo 4). When its all done, give it a good wash down, with water to remove all of the filler residue, and then with white spirits or acetone to clean it up (Photos 15, 16, 17 and 18).
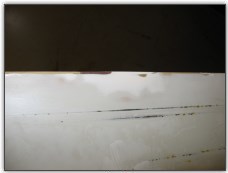
Photo 17. Edge all finished
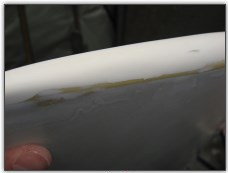
Photo 18. Bottom newly contoured
The final step in the process in this centreboard's case is to paint it. This should be done with a spray can of paint - although many classes won't allow the use of high gloss car paints, since it reduces friction on the surface too much. We haven't painted ours yet - we wanted to check how well it worked, which brings us to the next problem. We'll do an article on the painting when we do eventually do it.
So we found out that the gelcote filler, while fantastic for filling cracks and dents and holes, is not all that strong against compression or bashing forces, both of which a centreboard gets during its daily duty. After taking it out a couple of times, the back edge has already started chipping. Plus, we lost half the rebuilt filler on the bottom of the centreboard when someone didn't pull it up quick enough when we got into the shallows (*cough*). Therefore, we probably won't paint it for a while - we'll wait until the end of the season, see how much extra damage we've taken on it, and try out the gelcote with glass bead approach, since we plan to purchase a large amount of gelcote for covering up the filler on the deck (more on that later...)
Summary
So you can see it's pretty easy to mend a centreboard - the above approach works whether you're using gelcote filler, gelcote with glass beads or any general filler. It'll also work if you're using actual fibreglass although if you've ever used fibreglass you'll know it'll be soooo much messier and more difficult.
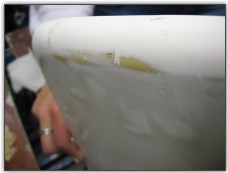
Photo 19. Bottom newly contoured
The final steps with this centreboard will be replacing the rope handle (when we find an offcut sufficiently thick enough), and replacing the elastic bungee on it, although neither are jobs that are in desperate need of doing.
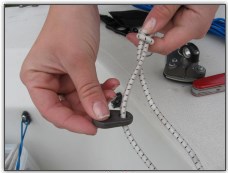
Photo 20. Replacing Bungee
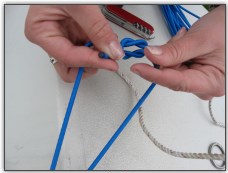
Photo 21. Replacing Bungee
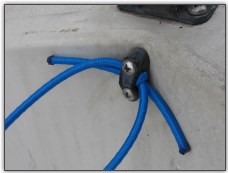
Photo 22. Securing the bungee
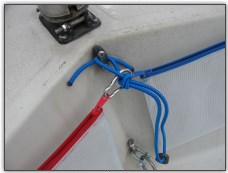
Photo 23. Securing the bungee
Happy sailing!