Wayfarer Rigging Guide
Go To: Sailing - Rigging Guides
Posted on 21 September 2009 15:59
The Wayfarer is a great boat for cruising, racing or training. Its' wide double chined hull gives' it great stability, and plenty of space gives it a lot of flexibility. They're easy to rig too, which you're about to find out!
Originally designed in 1957 by Ian Proctor, the Wayfarer is a large, nearly 16 foot long dinghy, suitable for learning, racing or cruising. Once a favourite boat of many sailing schools due to its size and stability, the Wayfarer has since lost out due to the more modern designs such as the Topper Magno, Topper Omega, Laser Stratos or RS Vision. As a glass fibre (GRP) constructed boat, they can be expensive for what they are, and don't take kindly to damage as well as the more modern rotomoulded one-design boats from Laser, Topper and RS.
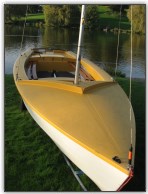
Photo 1, A wayfarer hull with the mast up
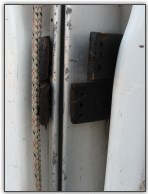
Photo 2, The mast gate and support
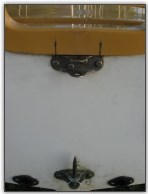
Photo 3, Standard rudder pintles
Big enough to comfortably sit three adults (and at a stretch on short journeys up to six), the Wayfarer is capable of longer trips, having even been sailed from Scotland to Iceland. There have been several versions of the design, ranging from wood to GRP, the later versions named the Wayfarer World. They have several internal bouyancy tanks, and usually a back hatch which can be used for storage. Inside, most have floorboards to level the floor, and several different bailing/draining systems can be found underneath. There is also a smaller version of the Wayfarer called the Wanderer.
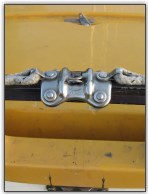
Photo 4, Mainsheet traveller
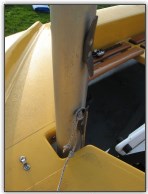
Photo 5, The mast with cleats
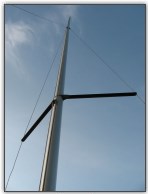
Photo 6, The mast and spreaders
A typical bermudan rig boat, the Wayfarer has a main and jib sail, and a symmetrical spinnaker (although the Wayfarer World is assymmetric). The boats typically used to be rigged aft-main, although newer models are centre-main, and they are relatively easy to convert. As a restricted design boat, the sail plan/size, hull shape/size and mast length etc are fairly limited, but lots of variations can be found in other aspects, such as booms, fittings, lines etc. The boats we are rigging are aft-main Mark 2 GRP boats. We used two boats to demonstrate some differences between booms and outhaul systems. We will not be rigging a spinnaker on this boat as the spinnaker halyard was unkindly removed.
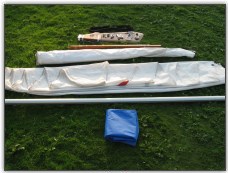
Photo 7, The parts we need
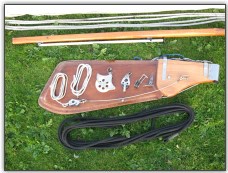
Photo 8, The rudder with the kicker and mainsheet
What You Need
- Mast, Spreaders, Shroud, and Forestay (unless you've bought from new, these should all be together) - Photos 1, 2 and 6
- Main Sail, Jib Sail - Photo 7
- Battens
- Main Sheet (10mm x 13 metres) + Blocks + Traveller - Photos 4 and 8
- Jib Sheet (10mm x 10 metres)
- Kicking strap/boom vang assembly + lines - Photo 8
- Outhaul (depends on arrangement)
- Downhaul (5mm x 2 metres)
- Boom
- Tiller + Tiller Extension, Rudder
- Painter (10mm x 3 metres)
- Hull (bit obvious this one) + Centreboard
- Bungs (depending upon boat type).
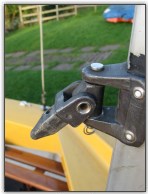
Photo 9, The gooseneck
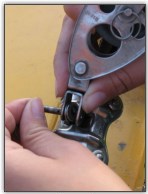
Photo 10, Attaching the mainsheet block to the traveller
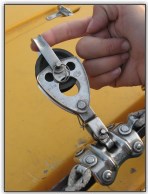
Photo 11, Mainsheet block attached to traveller
As always, remember if you are buying a boat that it may not always come as class legal - we are kindly borrowing these boats from a sailing school and they may not fall to form on class regulations. If in doubt - get a copy of the Class Rules which can be found on the Wayfarer Class assocation website and measure for yourself. If in doubt on any items, contact us!
Lets Get Started
We're going to rig the boat from the front to the back, and we're doing it on dry land as it wasn't a windy day. You may find it easier with a boat this size to get it on the water before you rig it, especially if you have pontoons you can moor up to.
Main Sheet
It's a little odd rigging the mainsheet first - but as we took it all off, it's easier to put this back on first before we have sails flapping around. First, attach the relevant block to the mainsheet traveller (here using a pin and split ring, Photos 10 and 11), and then attach the other block to the underside of the boom (shown here attached from the end of the boom, Photo 12). The main sheet on ours here is whipped onto the becket on the pulley block on the traveller (Photo 13).
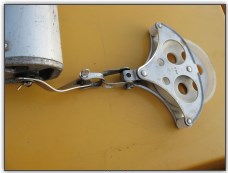
Photo 12, Mainsheet block on boom
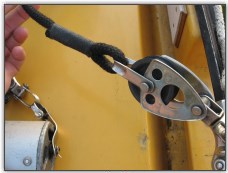
Photo 13, Mainsheet attached
Take the sheet up to the block on the underside of the boom, from front to back through the block, then back to the lower block, and back to front through this block (Photo 14); this is for an aft-main rig arrangement (Photo 15), yours' might be different if it's centremain. Also note the black band on the boom (Photo 16); you may find this on older booms, and it is the optimal point at which to pull the sail out to using the outhaul - pulling it any further past this point flattens and depowers it. You don't tend to see this on many modern boats!
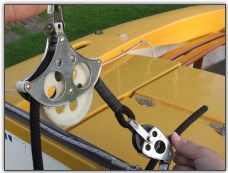
Photo 14, Feeding the mainsheet through the blocks
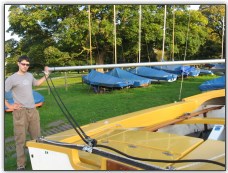
Photo 15, Boom and mainsheet rigged
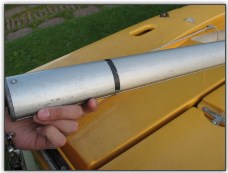
Photo 16, Black band on the boom
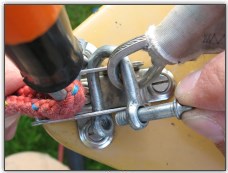
Photo 17, Attaching the jib to the front of the deck
Jib
First, we rig the jib, securing the tack (the front bottom corner) of the jib to the front of the boat, using the metal fixing point and a shackle (Photo 17). Next, we secure the rope stopper for the halyard to the top of the sail (see article) or use a shackle (Photo 18), and then hoist the jib. Secure it around the cleat (see article) as in Photo 19. Attach the jib sheets to the clew of the jib - this is best done by finding the middle of the rope, tying a stopper knot in it, feeding it through the jib clew and then tying another stopper knot the other side to hold the middle of the rope in place. Next, pass the jib sheets through the jib fairleads (Photos 20 and 21), and secure with a stopper or figure 8 knot (Photo 22).
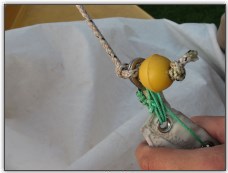
Photo 18, Attaching the jib halyard with a rope stopper
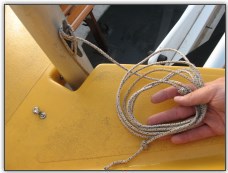
Photo 19, Cleat and coil the halyard
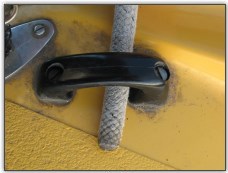
Photo 20, Jibsheets through the fairleads
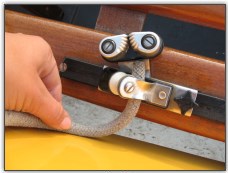
Photo 21, Feed the jibsheets through the jammers
Main Sail
Feed the main sail car along the bottom of the boom (Photo 23); the wayfarer does not have a loose footed sail, so the boom has to have the sails' bottom edge bolt rope (the thick edge that feeds up the mast or along the boom, again in Photo 23) fed through it, with the small plastic car first (if your sail has one). Feed it all the way along until the eyehole at the tack (the front corner) has reached the front end of the boom. Secure the tack eyehole to the boom using a split pin (Photo 24), then secure the outhaul at the other end.
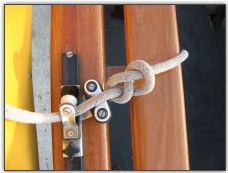
Photo 22, Secure the jibsheet wiht a knot
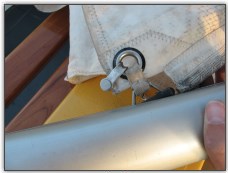
Photo 23, Feed the mainsail car into the boom track
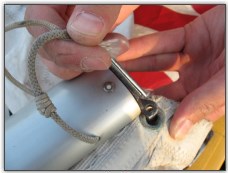
Photo 24, Secure the tack of the mainsail
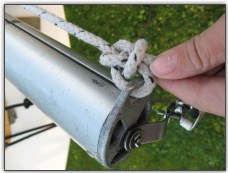
Photo 25, Attaching the basic outhaul to the boom
We have two types of sail and boom shown here; the first type has an exterior boom outhaul, which can be rigged in one of two ways. We've rigged it up by first tying a bowline on the end of the boom (Photo 25), then taking this through the clew (back corner) eyehole of the sail, then back through the end of the boom (Photo 26); this creates a multi-purchase system without using pulley blocks. We've then tied this off and secured it with a series of hitches (Photos 27 and 28). This is for if you do not wish to use the outhaul, and just want a more simple system.
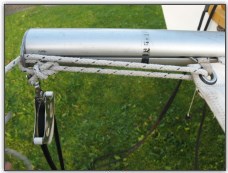
Photo 26, Securing the basic outhaul
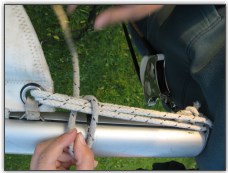
Photo 27, Securing the basic outhaul
The exterior boom outhaul is designed for slightly smaller diameter rope than we have. The idea is to take it from the back of the boom as we did, without the half hitches (Photo 29), then take it along the length of the boom. At points along the boom are fairleads or eyeholes (Photo 30), and at the mast end of the boom is a jammer cleat which we have not shown (but are heading towards in Photo 31).
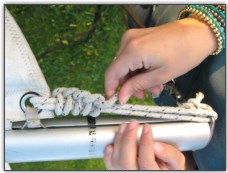
Photo 28, Securing the basic outhaul
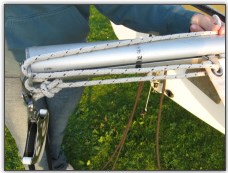
Photo 29, Alternative to secure the basic outhaul
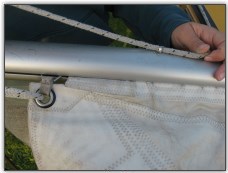
Photo 30, Alternative to secure the basic outhaul
For the second type of boom we have, there is an interior outhaul. The outhaul is hidden inside the boom (Photo 32), with the working end that you pull all the way at the front of the boom, coming through a sheave block through to a jammer (and onward to a pully block on this boat) as in Photo 34. The other end is taken around the sheave at the end of the boom (Photo 32), through the clew eyehole in the sail, and then secured to the end of the boom - there is a small notch in the back of the boom which when used with a knot in the rope can secure the outhaul (Photo 33). This may not look very secure - but when under tension, it will not come out. Many more modern high performance dinghies such as the RS200, RS400 and Laser 2000 use this method for securing not only the outhaul, but also the downhaul as well.
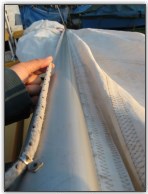
Photo 31, Alternative to secure the basic outhaul
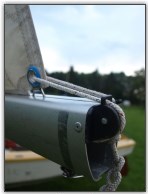
Photo 32, The better outhaul
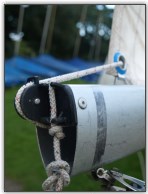
Photo 33, The better outhaul
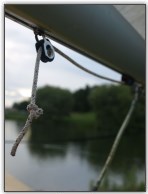
Photo 34, The better outhaul fed to the cockpit
Raise the sail
Next, we raise the sail. Before you do this - you should put the battens in the sail. This is probably one of the most common things that is forgotten when rigging a boat, and how embarassing is it to pull the sail all the way to the top, and finish rigging to look around and spot the battens lying on the floor? Doubly so when you're doing a rigging guide! The Wayfarer has three battens, and they should all be inserted before hoisting the mainsail.
First, secure the main sail halyard to the head of the sail using a stopper knot like in Photo 35 (at this point, also secure any mast top bouyancy bags you may be using to stop the boat inverting if you capsize). Slot the bolt rope on the luff (front edge) of the sail into the mast groove (Photo 35). One person should feed the mast luff in as the other person hoists the sail by pulling on the halyard (Photo 36). Keep hauling until the sail is at the top of the mast - as the sail reaches the top you may find it easier if the other person lifts up the boom to take the weight off and make hoisting easier. Secure the end of the halyard around the cleat, ours is a figure 8 cleat. Next, pull the boom down onto the gooseneck; if you put it on the gooseneck before hauling it up to the top, you will struggle to pull the sail up with the boom resisting you (Photo 37).
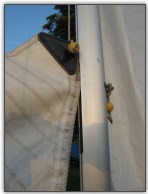
Photo 35, Feed the main sail in to the mast
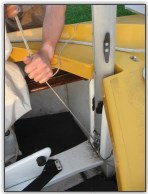
Photo 36, Hoist the main sail
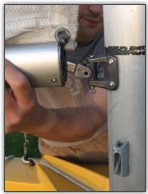
Photo 37, Pull the boom down onto the gooseneck
We didn't rig a downhaul on this boat as it isn't usually rigged up with one, as it's a training boat. There are however plenty of spare cleats, so it's easy to add one if you wish. Usually, this will involve tying the end of a length of rope to a fitting (on the side of the boom if possible), through the eyehole of the sail, and then down to a cleat. If it's light winds, don't worry - downhauls are only really needed when it gets windy!
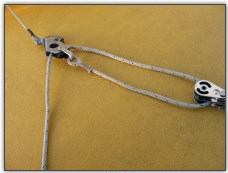
Photo 38, Assemble the kicking strap
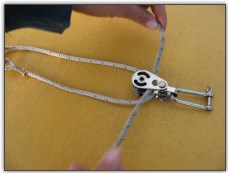
Photo 39, Assemble the kicking strap
Kicking Strap
As with most kicking straps, there is a great deal of variation out there, particularly if you are ignoring class rules. The kicker on our Wayfarer is a 4:1 ratio. Assemble the kicker as shown (Photos 38 to 41 inclusive) or as necessary if yours is different (get in touch with us if you are stuck with yours). Attach the bottom end to a fitting on the bottom of the mast (usually a fairlead or metal D-Loop) with a shackle (Photo 42), and the top end to the boom fitting - this will be with either a key that fits in a slot, or a shackle fitting (Photo 43).
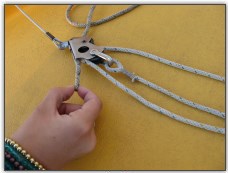
Photo 40, Assemble the kicking strap
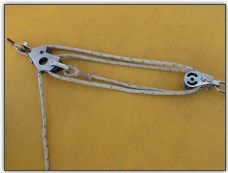
Photo 41, Assemble the kicking strap
Don't tension the kicker too much while you're on land, if it's windy and you tighten it, the force going through the sail into the boom can only make it jump from side to side with a lot of force, but if you leave the kicking strap loose the boom can jump up and down with the wind also, so it will move around side to side less, effectively depowering it and lowering the chance of someone getting knocked out!
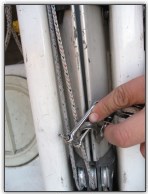
Photo 42, Attach the kicking strap to the mast
Rudder
Next, it's time for the rudder. Drop the rudder onto it's pintles carefully (Photo 45), and then feed the tiller into the top of the rudder (Photo 46). You should have some method to secure the tiller into the rudder stock, as you can see on ours its a split or clevis pin, through a hole in each (Photo 47). This will stop the tiller coming out and the rudder floating off if you capsize. Note we've also put the bungs in at this point (Photo 44).
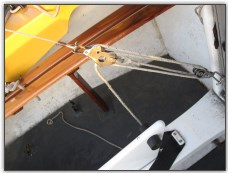
Photo 43, The finished kicking strap
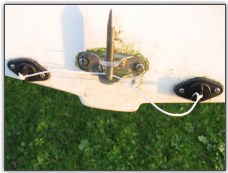
Photo 44, Secure the bungs
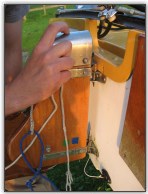
Photo 45, Attach the rudder
Finally, all well setup Wayfarers should have two lines on the rudder, an uphaul and a downhaul. The uphaul can be just a length of rope, on ours going from the middle of the back of the blade (as can be seen in Photo 48) to the tiller (Photo 49), to hold the rudder blade up when you are out of the water. The downhaul is harder to see, but is a length of rope from the front of the underneath of the rudder blade (as can be seen in Photo 48), with a length of elastic attached, which is pulled and fits on a catch or hook on the tiller (we can't show this as you can only do it when sailing to hold the rudder down). When out sailing, pull this and hook it on to keep the rudder blade down - if the rudder hits the bottom, the elastic will come into play and allow the blade to move backwards.
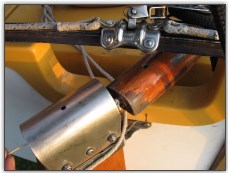
Photo 46, Insert the tiller
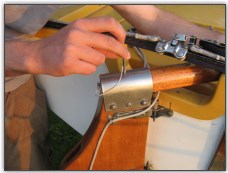
Photo 47, Secure the tiller
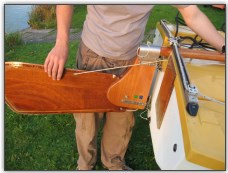
Photo 48, Secure the rudder blade in the up position
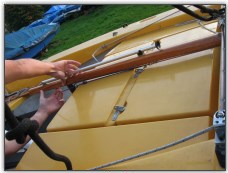
Photo 49, Secure the rudder blade in the up position
Finally, ensure all self-bailers are up, and all bungs are secured. On this boat, the bungs have been tied together, through the rudder pintle with a short length of cord.
Summary
There you have it, a fully rigged Wayfarer (Photos 50 and 51) - for the size of the boat, it's astonishingly easy to rig. There are different variations, Mk 1, Mk2, Mk3 and Wayfarer Worlds, all with fairly similar rigging arrangements. However, you can also get centre-main versions which aren't much more difficult to rig, and you can now even get asymmetric versions with a bowsprit. Whatever Wayfarer you are rigging, get it right and you can have a great day cruising, racing or just playing around!

Photo 50, Ready to sail!

Photo 51, Ready to sail!