Topper Standard Rigging Guide
Go To: Sailing - Rigging Guides
Posted on 24 November 2007 19:02
Got a topper but not sure how to rig it? Check out our rigging guide for toppers.
Toppers are massively popular, particularly with sailing clubs, and there's a good chance if you learn to sail, particularly if you are under the age of 18, at some point you'll spend some time in a topper. With a well supported club scene, they're a great boat to get into (if a little cramped for bigger people). Don't get left behind - here's how to rig a topper (standard, not race kit!).
What you need:
- Mast (top and bottom sections);
- Boom;
- Main sail;
- Rudder, Tiller and Extension;
- Daggerboard;
- Outhaul (long length of rope);
- Cunningham (medium length of rope);
- Clew tie down hook
- Mainsheet;
- Kicking strap;
- Painter rope;
- Horse (a rope for the rear rigging arrangements)
- Bung
Lets Get Started!
As always, before start, make sure you have everything ready and don't have to go running back to the sail room! Assemble all your pieces, using the list above as a guide. You might need extra pieces of rope here or there. Make sure the boat is generally clean (it doesn't have to be spotless!), since you don't want to be sitting in a boat full of dirt. The most common colour for topper hulls, as you can see in Picture 1, is red. Pay careful attention to the ropes in Picture 3, and the white plastic tophat piece on the right side of the picture, by the bung.

Fig 1. Topper hull, bouyancy tank outlet
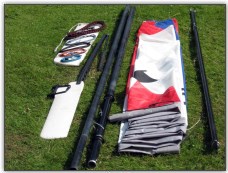
Fig 2. Ready to rig, can you name them all?
In Figures 2 and 3 the equipment is laid out ready to rig. We've taken everything apart and coiled it up neatly to show the rigging from a starting point. If you get a topper brand new, it'll may not be even at this stage, but you should get instructions with it, to get it to the point where you can follow our guide. If not brand new, then some of this may be already done, such as the main sail. In Fig 2, notice the mast section on the left is the top, and just to the right of it is the bottom section, with the kicker fitting and halyards on it at the bottom.
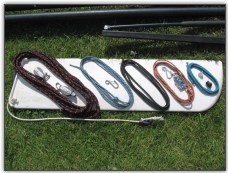
Fig 3. Closeup of the various ropes
1. Bungs and Bailers!
Put a bung in the back of the boat and ensure the self-bailer (usually in the front of the cockpit on the right hand side, shown in Picture 5) is in the up position so water doesn't leak into the boat before you turn into a non-sailing bathtub. This is the most common place for water to enter the boat (other than a capsize).
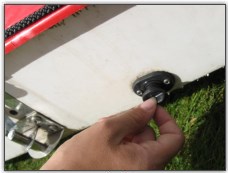
Fig 4. Inserting the bung
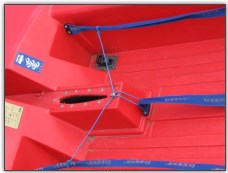
Fig 5. Self bailer position
2. The Mast
Put the mast halves together (aligning the small pins in the lower half of the mast with the slot in the upper half, they won't come apart when the sail is fitted over the mast, the sail and gravity will hold them together when it is pulled on.
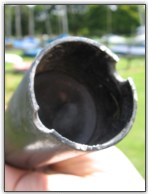
Fig 6. Mast notches

Fig 7. Line up the mast
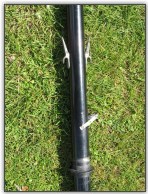
Fig 8. Get it the right way round
3. The Sail
Topper sails don't have any battens; however, there should be a halyard (length of rope) running up the inside of the mast sleeve (the part you feed over the mast), then through the top of the mast end sock (Picture 9).
Make sure this halyard stays in position as you run the sail over the length of the mast. The end of this halyard should go up through the hole in the top of the one side of the bar on the top of the mast (Pictures 10 and 11, the rope is going up through the hole), down through the other side, and attached to the ring in the top of the sail using a bowline, or a bowline to a shackle. Make sure the loop on the bottom edge of the sail is in line with the one cleat and kicking strap metal loop at the bottom of the mast (Picture 8). Cleat the bottom end of the halyard around the clam cleat it's in line with (Picture 12).
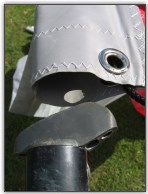
Fig 9. Inserting the mast
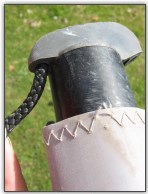
Fig 10. Through the top of the mast
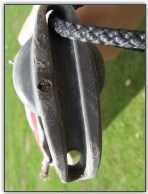
Fig 11. Through the top of the mast
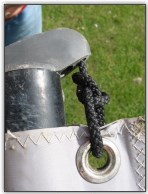
Fig 12. Attaching to the sail
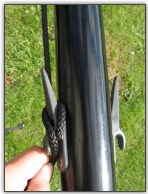
Fig 13. Cleat the halyard
4. Raise the Mast
Raise the mast, ensure the bottom is clean, and drop it in the mast step (Picture 14). There is a short piece of rope with a small tophat on both ends - pulling on the short end of this rope will pull the deck lock into place, securing the mast (Picture 15). Pop the tophat into the hole in the deck plate to secure it.
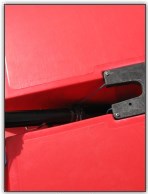
Fig 14. Guiding the mast
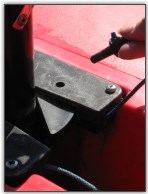
Fig 15. Securing the mast
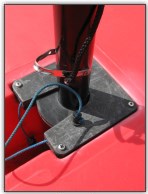
Fig 16. All done (with the mast!)
5. The Outhaul
Make sure you have the boom the right way up for this step; the metal fixing near the mast end should be on the underneath, since it's for the kicking strap to attach to. Pass one end of the outhaul rope through the highest hole on the TOP of the end of the boom (note that we rather not so helpfully had our boom upside down, Picture 17). In the picture you should just about be able to make out two holes - go through the outermost one first. You need to put a stopper knot in one end of this rope, then feed the other end through the spring-loaded S-hook that will attach to the clew of the sail. In our picture, again, we have it upside down. Just use the pictures as a reference for this step, and we'll replace the pictures with some more as soon as it stops raining so we can take some!
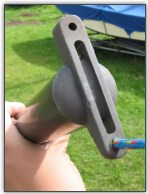
Fig 17. Starting the outhaul
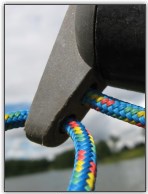
Fig 18. Back through
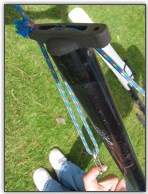
Fig 19. Around the end
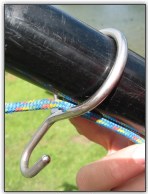
Fig 20. Through the clew hook
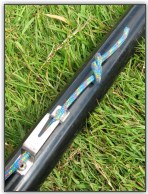
Fig 21. Through the jammer
Big breath... pass the rope back through the hole above the one that you've already come through, around the guide in the end of the boom (see Picture 19), and then through the hole closest to the boom on the other side of the boom (you are now passing the rope back along the underside of the boom). Pass the rope along, through the metal S-hook that acts as the clew tie down (once again, we have the hook upside down, underneath the boom, whereas when its' hooked into the sail it will be above the boom, Picture 20). The rope carries on through the jammer; tie a stopper or figure eight knot and secure (Picture 21).
6. Add the Boom
Clip the boom onto it's fitting on the mast, with the main sail halyard inside of the clip (we're showing it outside for the purpose of showing what not to do). Secure the clew of the sail onto the boom with the clew tie down (metal hook or piece of rope), and then clip the outhaul through the clew of the sail (Picture 23).

Fig 22. Adding the boom
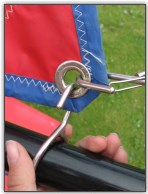
Fig 23. Clew and outhaul
7. The Cunningham
Using a metal s-hook, shackle or bowline, attach the downhaul or Cunningham to the metal ring in the bottom of the sail by its leech (where it meets the mast, Picture 24), and use a cleat on the mast to secure the rope at the required tension (Picture 25).
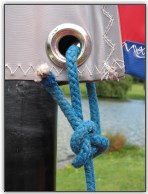
Fig 24. Cunningham
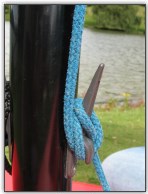
Fig 25. Tie it off
8. The Kicking Strap
Assemble the kicking block as shown, and clip the kicker jammer block onto the mast using the metal loop indicated, and click the s-hook to the fitting on the underside of the boom.
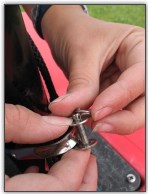
Fig 26. Secure the jammer
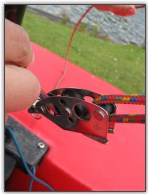
Fig 27. Bowline start
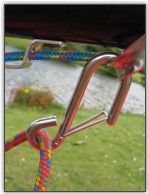
Fig 28. Around the hook
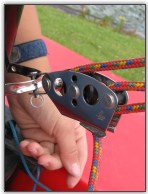
Fig 29. Around the block
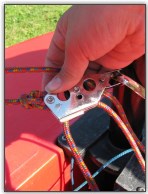
Fig 30. Through the jammer
9. The Horse
Attach the horse; tie a bowline in the one end (Picture 31), feed the working end through the eyeholes (Picture 32) and then back through the bowline (Picture 33) forming a triangle (Picture 34), then the working end goes through the jam cleat inside the cockpit (Picture 35). Tie a stopper knot as necessary.
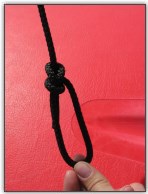
Fig 31. Secure the jammer
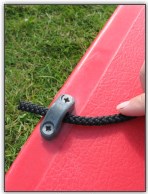
Fig 32. Bowline start
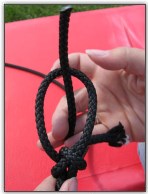
Fig 33. Around the hook
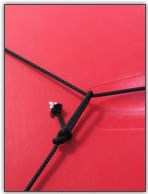
Fig 34. Around the block
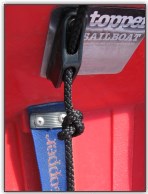
Fig 35. Through the jammer
10. The Main Sheet
Attach one mainsheet block to the underside of the end of the boom, and the other (the one with the becket, Picture 36) is attached to the horse between the two eye holes (Picture 37). Attach the mainsheet around the becket on the lower block. Feed it up through the top block, which should be a swivel block attached to a hole on the underside of the boom end using a pin (Picture 38), then back down through the lower block (Picture 39), and drop it into the cockpit. Tie a stopper knot in the end as required to stop it all feeding back through.
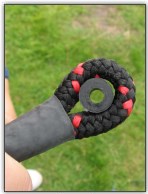
Fig 36. Mainsheet becket
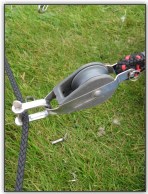
Fig 37. First block
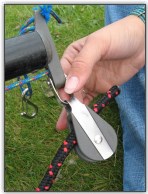
Fig 38. Second (swivel) block
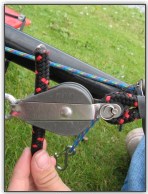
Fig 39. Back through the first block
11. The Rudder
Attach the rudder - click the rudder onto its pins on the back of the boat (Pictures 40 and 41), and feed the tiller and extension underneath the main length of the horse with the mainsheet block attached, and over the other part of the horse as shown. Pull and raise the tiller extension to raise the rudder block and lock it in the up position.
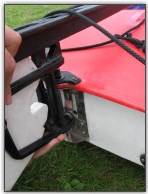
Fig 40. Attach the rudder
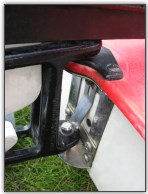
Fig 41. Clip it on
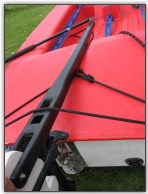
Fig 42. Under the horse
12. The Daggerboard
Using shock cord/bungee cord and a clip, attach the daggerboard to the mast (Picture 43) to stop it falling off in the event of you going for a swim.
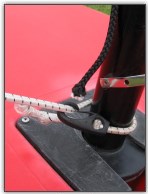
Fig 43. Secure the daggerboard
13. Done!
Grab a bouyancy aid and go enjoy yourself!
- Download the PDF version of this article